MOULINEX COOKEO+ SMART ELECTRIC PRESSURE COOKER 6L CE851
COOKEO+ SMART ELECTRIC PRESSURE COOKER 6L CE851COOKING MADE FAST; Up to 5 times faster than traditional pot cooking
Discover Cookeo+, the intelligent high-pressure multicooker that will become the kitchen helper you can't do without! 100 built-in recipes written out on screen provide step-by-step instructions. Find the perfect one with the filter. Save time with the pressure cooking mode, for meals ready in no time and with no monitoring needed—Cookeo+ releases the pressure and keeps your meals warm automatically. Plus, with 6 cooking modes, enjoy a wide variety of delicious dishes every day!
Enjoy fast meals when time is of the essence, thanks to the convenient pressure cooking mode. You can also cook individual ingredients in addition to your pre-programmed recipes, for added flexibility and practical use.
You can save time as Cookeo+ manages your cooking for you with no need for monitoring, releases the pressure automatically and even keeps your meals warm.
Cookeo, specially designed with recpies from different regions ( Gulf, Levantine, Egypt & International cusine) with Arabic & English interface.
Reference : CE851127
Voir la description du produit
Cook quickly and easily with an intelligent multicooker with 100 built in recipes that guide your every step
Introducing Cookeo +, the smart multicooker equipped with 100 built-in recipes, step-by-step instructions and special filters for versatile and easy recipe searches. Save time by using the pressure cooker mode, for express results that couldn't be easier—with Cookeo + releasing the pressure on its own and keeping your meal warm and ready. With 6 versatile cooking modes, Cookeo + will soon become the kitchen helper you can't live without!*vs Cookeo CE70
Voir la description du produit
Technical specifications / comparison
| Step by step guidance | On screen (with text) & on mobile device app
|
| Number of built-in recipes | 100
|
| Product type | Smart multi pressure cooker (incl. guided recipes)
|
| Max pressure level (kPa) | 70kPa (Up to 3x faster than pot cooking)
mN/mm^2(kPa) |
| Pressure cooking | Yes
|
| Numbers of serving | Up to 6 people
|
| Connected | No
|
| Built-in recipes directly on device screen | Yes
|
| Application | Yes, Moulinex app (available depending on country)
|
| Delayed start | Yes (Choose exactly when you want to eat)
|
| Airfring function | No
|
| Manual mode | Yes
|
| Cooking by ingredient (grains, vegetable, meat & seafood) | Yes, select your ingredient and get the perfect cooking result
|
| Keep warm | Automatic
|
| Accessories | Steam basket
|
| Control panel | LED
|
| Tilting screen | No
|
| Reproportion by number of servings | Yes, for 2, 4 or 6 people
|
| Adjustable recipes by ingredients you have at left at home | No
|
| Allow multi-layer cooking to cook a full meal at once | No
|
| Safety device for overpression | Yes with automatic pressure release
|
| Inner bowl coating | Non-stick ceramic coating
|
| Dishwasher safe | Yes bowl and accessories
|
| PFOA free | Yes, safety bowl coating
|
| Type of plug | UK
|
| Removable Cord |
|
| Visual cooking | No
|
| Voltage | 220-240
V |
| Frequency | 50-60
Hz |
Voir les documents liés
Documentation
Voir les questions les plus fr�quentes
FAQ
• Enter a word in the search field.
Tip: recipes are found using key words, so it is easier to enter a type of vegetable (e.g. carrot) rather than just vegetable.
• Go to the recipe you wish to bookmark and select the bookmark logo in the top right corner.
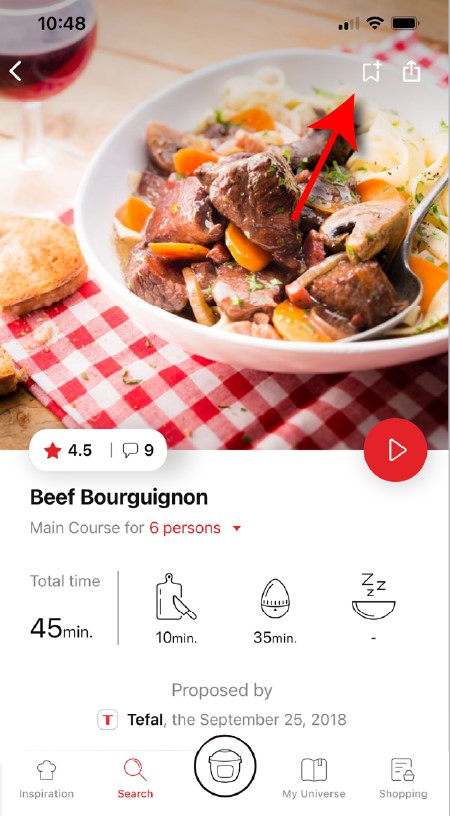
• A "My Notebooks" tab appears: select the "My Favorites" location.
• The recipe has been added.
Click the sharing logo to view the sharing options.
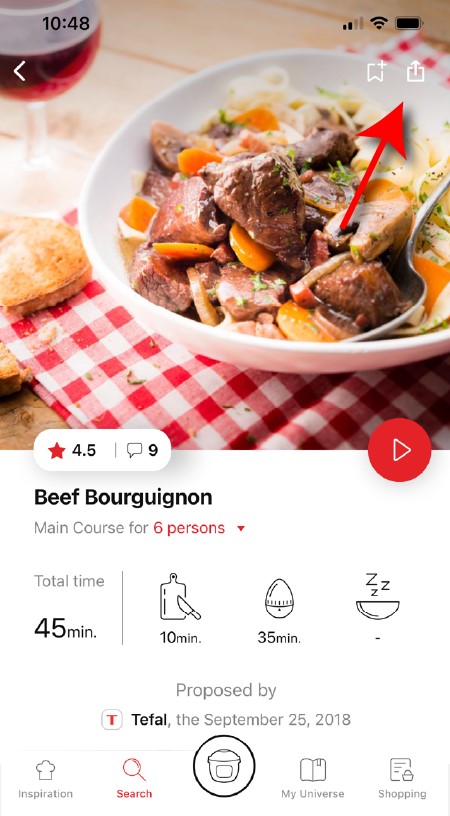
You can then choose how you would like to share this recipe.
If your application does not download correctly, delete it and try to download again when you have a more stable Wi-Fi connection.
During initial installation, the download may take several minutes while the application saves all the photos on your Smartphone or tablet.
If you want to turn off this signal, simply deactivate it in your tablet or Smartphone.
You may also disable sounds in the parameter settings for notifications on your telephone or tablet.
If you wish, you can disable them from your smartphone settings.
However, the grey cookies banner will remain on your screen as long as you do not click on "accept".
 Cookies are used for audience measurement and personalization to help us improve your use of the product.
Audience measurement solutions allow us to analyze traffic, trends, usage and identify malfunctions in order to improve your experience.
Personalization solutions allow us to improve the quality of the information and services we provide and make your experience more enjoyable.
You can accept or deny the use of cookies when you first launch your device.
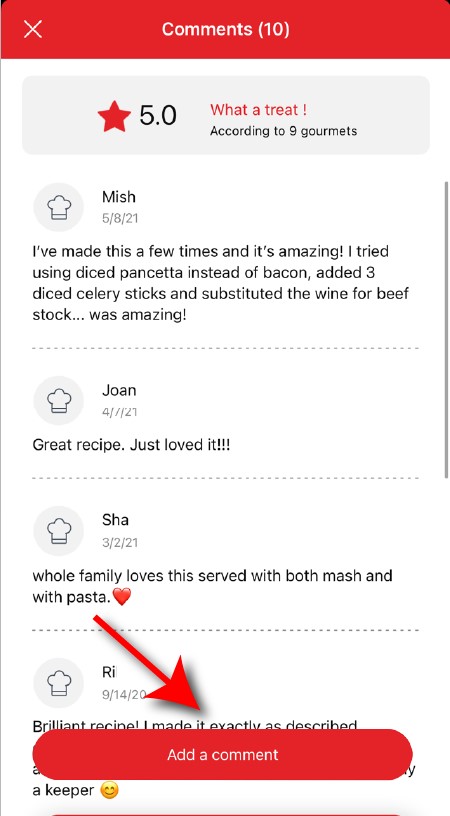
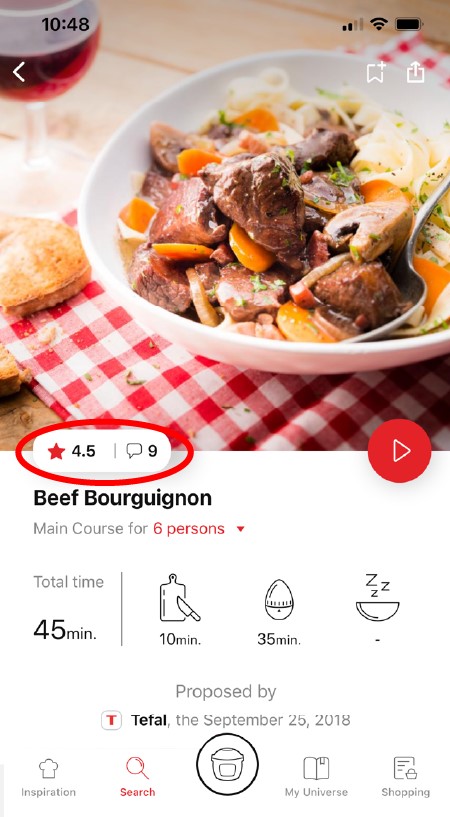
Once logged into your account, you will be able to rate the recipe and add a comment by following the instructions that appear on the screen after clicking on the notes/comments space.

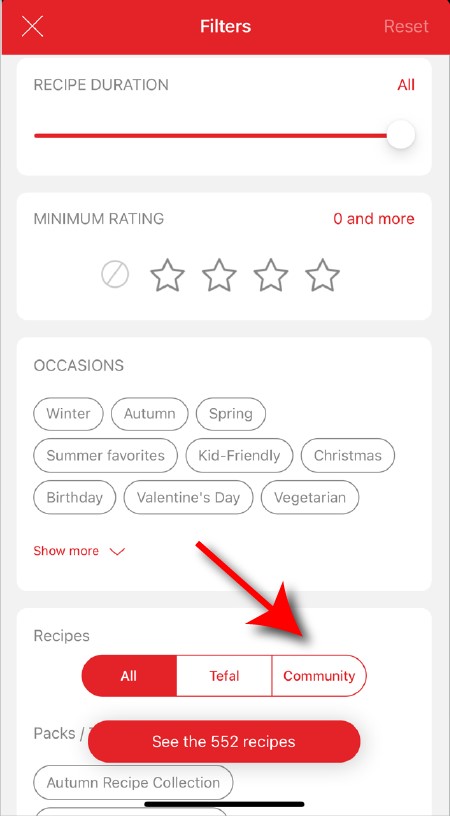
In the "Recipes" section, select "Community" only.
You will then be able to see the recipes from the community.
The customizable filter:
• Click on "Filter" in order to sort the recipes according to the type of dish (starter, main course, dessert), the time it takes to make the recipe, the minimum rating, their themes (or packs)...
• You can also choose to select only the recipes of the brand or the recipes proposed by the community.
Sorting recipes:
Once you have made a search, you can sort your recipes by popularity, rating, age or alphabetical order.
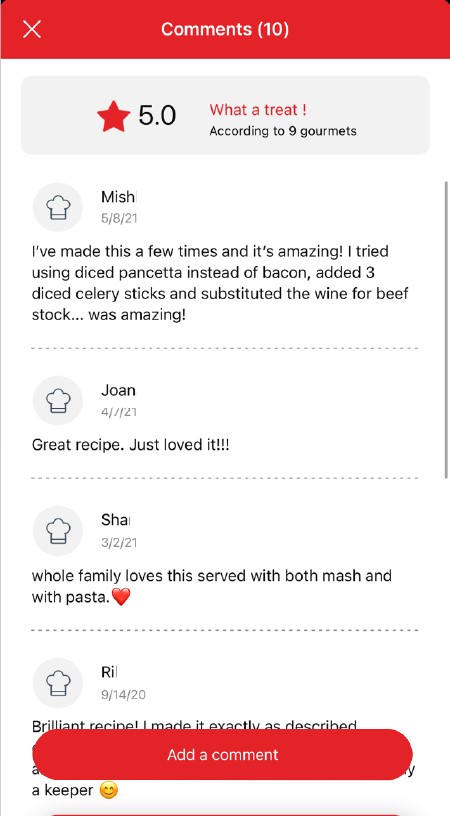
Once logged in, you will be able to read the comments and see the notes that community members have given to the recipe by clicking on the notes/comments area.
We will not validate a recipe from another author that has been copied from a website or blog.
Be careful, it is forbidden to use a photo from the Internet or a book.
You must take a photo of your recipe's result in order to be able to deposit and share it. Your recipe will be rejected if the photo is found on the Internet and you are not the original author.
Avoid abbreviations of words as much as possible and avoid using too familiar language, local expressions... To be well understood by everyone, regardless of their location!
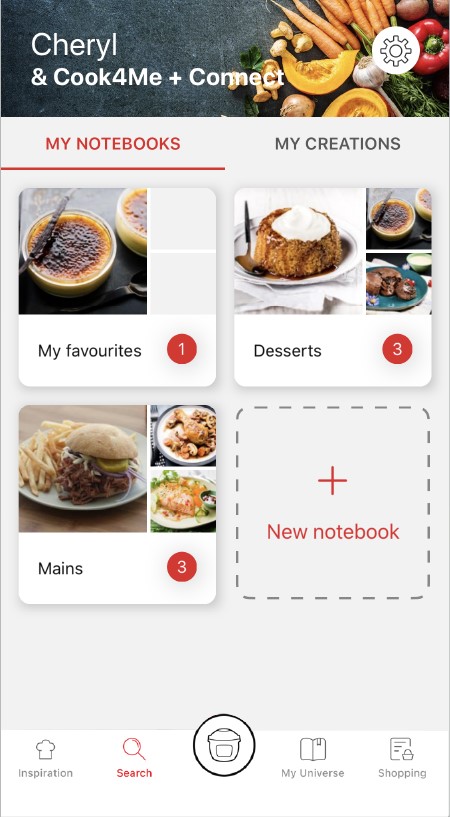
• Choose the "My Universe" tab in the navigation bar.
• There, you will find your recipe booklets and can create new ones by clicking on "New booklet".
- From the recipe search page:
Click on the search bar and then on the tile "Want to share your best recipes? Create them" and follow the instructions.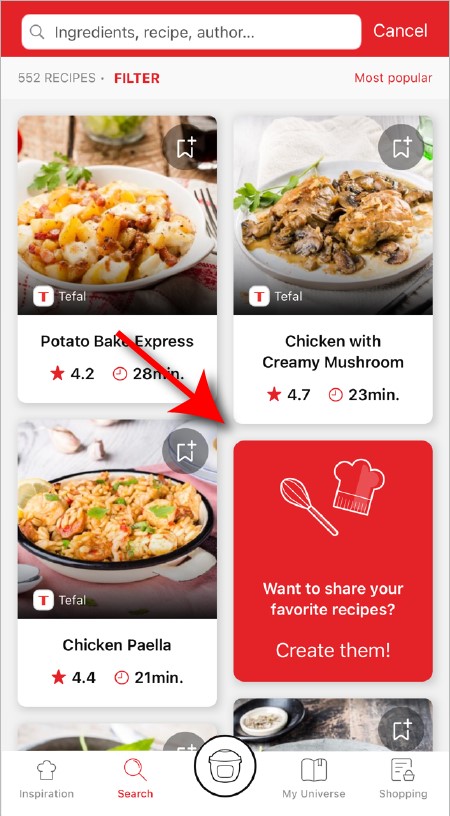
- From the "My Universe" tab:
Click on "My creations" then "Propose your recipe" and follow the instructions.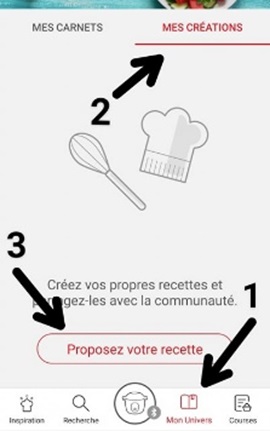
A delay of about 48 to 72 hours is therefore necessary before you find it on the app.
A confirmation email will be sent to you notifying you of the validation or rejection of your recipe.
As far as possible, we recommend that you update your device to a higher Android version or use another compatible device.
Updates will not only allow you to enjoy a richer experience with new features and compatibility with the latest technology, but will also protect you against possible security vulnerabilities that have been fixed in the latest versions.
It will also let you add your accessories and access the associated recipes.
• Click on the image of the registered product.
• Click on "Remove the product". The app will then ask you to select a product.
Make sure that the device is installed on a flat, stable, dry and heat-resistant surface.
Depending on the model, you can choose your country and language.
Make sure there is no food or liquid residue under the bowl or on the heating plate.
Then install the bowl into the appliance.
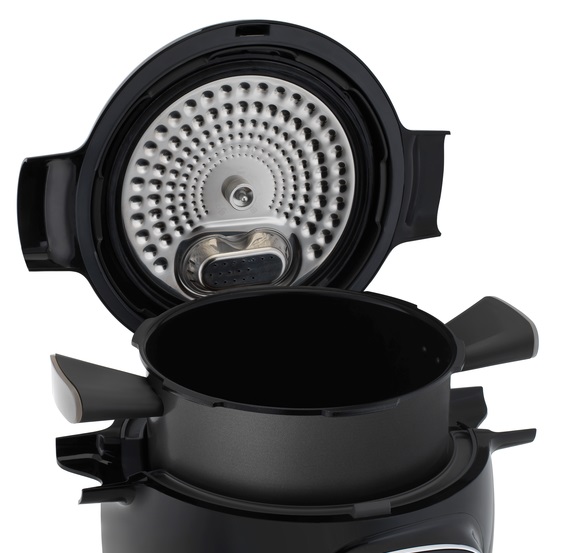
Never use the appliance without the cooking bowl.
Note: When using your appliance for the first time, the bowl may release a slight odour. This is normal.
• Back/Cancel Button: A short press on the Back/Cancel button allows you to return to the previous step.
• A long press (3 seconds) on the Back/Cancel button allows you to reset a function at any time.
It is deactivated by the device for the preparation of programmed recipes containing fragile ingredients such as milk, fish, meat or eggs (see manual).
Only possible with some ingredients such as rice, cereals and vegetables up to 15 hours in advance.
These are health requirements to avoid possible undesirable bacterial growth.
• For food that may expand during cooking (rice, seeds, lentils, peas, etc.), do not fill the bowl beyond half its maximum capacity.
• The bowl should always be filled with a minimum of 200 ml of liquid.
• When the timer reaches 0 and the following screen appears, you will notice a release of steam at the back of the lid during the decompression phase.
! Don't put your hands near the steam exhaust!
It is possible that a slight flow of steam may escape from the back of the appliance during cooking.
• Always use a minimum of 200 ml of liquid.
• Place the steam basket in the bowl and make sure that the food does not touch the lid.
• When the timer reaches 0 and the next screen appears, you can see steam coming out of the back of the lid.
! Do not put your hands near the steam exhaust!
It is possible that a slight flow of steam may escape from the back of the appliance during decompression phase.
You monitor the cooking time. Let the ingredients cook until you are satisfied with the result. Then click OK to stop cooking.
The maximum duration of this mode is 5 hours.
After 5 hours, the appliance will go into standby mode.
When choosing delayed start, you must set the current time and the time you want your recipe to be ready.
The recipe sequence is then the same as for an immediate start.
The delayed start is only available in the "manual cooking" and "ingredient cooking" modes for certain ingredients only.
• Apply pressure to the probe in the centre of the central nut to release the lid.
• Ensure that the cover of the decompression ball is in the correct locked position.
After each use, allow the appliance to cool, then dismantle the cover and its components (valve cover, ball cover and ball) then clean with soapy water.
Before reassembly, move the valve to ensure that it is working correctly, and check that the vent below the ball is not obstructed.
• Check that the nut of the metal lid is quite tight.
• Check that the violet ball cap (located on the top of the metal lid) is in the correct locked position (closed padlock).
• If you are at the end of cooking and you want to close the lid, wait until the hot vapours have dissipated before closing the lid.
• Check for foreign bodies between the bowl and the heating plate. Remove the bowl and check that the heating plate, the central element and the underside of the bowl are clean. Also check that the central element can move freely.
• The bowl may be deformed (after an impact, fall...). The bowl must be changed at an authorised service centre.
• Unplug the product and wait until it cools completely.
• Once the product is completely cool (total absence of internal pressure), insert a rod into the hole located between the opening handle and the silent valve.
• Be sure to thoroughly clean the items listed in the instructions: cooking vessel, metal lid, before re-using your appliance.
• Turn off the demo mode.
• Enter the code 3424 using the scroll wheel.
• Press OK.
• Your device will reboot and return to normal mode. The "Demo" logo has disappeared and your device is ready for use.
Do not use fruits that become frothy during cooking.
• There is no recipe book included in all offers.
• Stop the ongoing process, open the lid and add a sufficient quantity of water. Restart the recipe or re-heat manually.
• Our tip: When cooking rice and other foods susceptible to high water absorption during cooking, check the instructions on the food packaging carefully and add the minimum amount of water required for cooking under pressure (up to 200ml for maximum quantity/long cooking time).
Let the product cool down completely, then remove the metal cover and check that the vertical marker on the ball cover is opposite the icon showing a locked padlock.
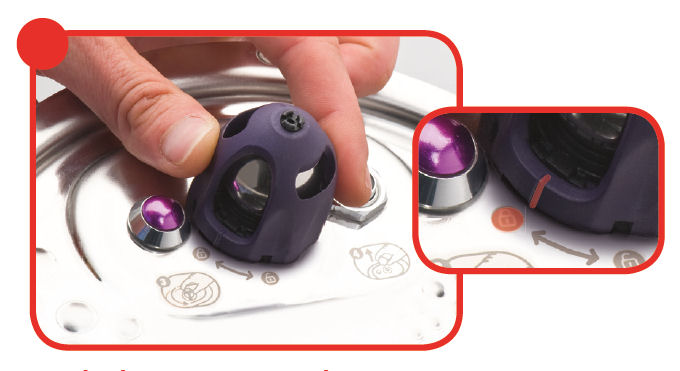
If the problem persists after this check, take your product to one of our approved repair services.
Let the product cool down completely, then remove the metal cover and check that the vertical marker on the ball cover is opposite the icon showing a locked padlock.

If the problem persists after this check, take your product to one of our approved repair services.
2. Unscrew the nut on the metal lid.
Wait until the device is cold to unscrew the central nut and remove the lid.
- Check with the help of the user manual that all parts of the inner metal cover are present, securely in place and clean and that the metal cover is sufficiently screwed on.
- Make sure that the locking rod is not mounted upside down. The magnetised part of the locking rod must be on the same side as the ball and the locking rod seal on the opposite side of the ball.
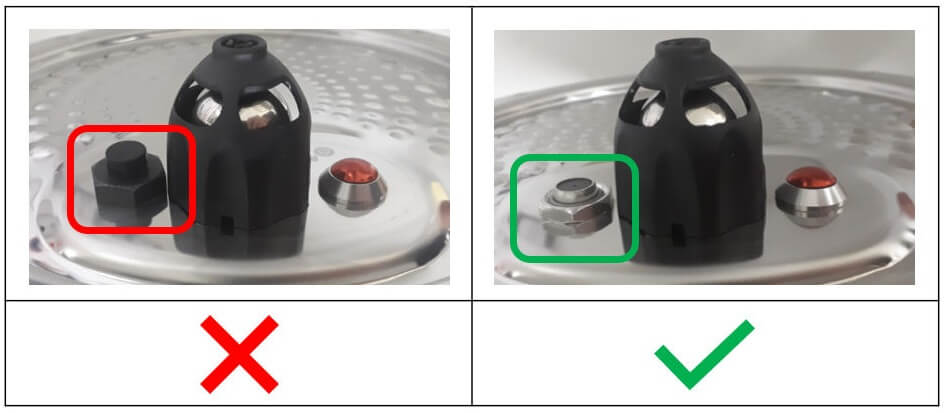
- Check that there is sufficient water in the cooking bowl.
The seal should be changed every 3 years at the most. Take your device to an approved service centre.
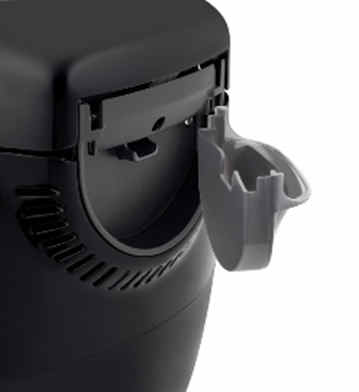
Check that the filling is not excessive and that the food does not expand. Some ingredients (such as cream, milk, wine, etc.) are sensitive and may cause overfilling. Be sure to follow the ratio indicated in the instructions.
If the problem persists, take your device to an authorized service centre.
We recommend liquid or gel detergents, which are softer.
To restore the original appearance: using a sponge and a mixture of hot water and white vinegar, clean and then rinse the pot thoroughly.
Our advice: for greater satisfaction over time of your pot, we recommend manual washing with a mild detergent.
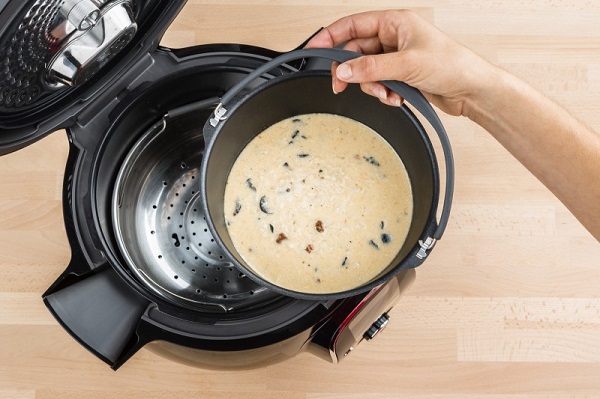
Always remember to add 25 cl of water to the bottom of the bowl for steam cooking.
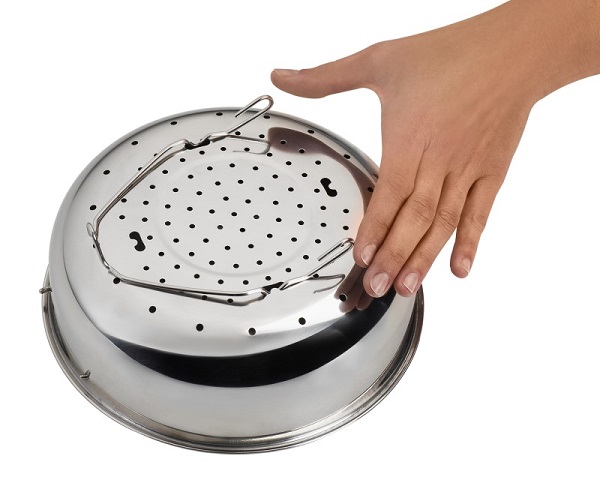
The Touch model has its own pot which is not compatible with the other models.
The 3L pot cannot replace the 6L pot, nor can it be fitted into it.
• either in low position to raise your food for better air circulation.
• either in high position to have 2 cooking levels, one at the bottom of the bowl, and one on the grid.
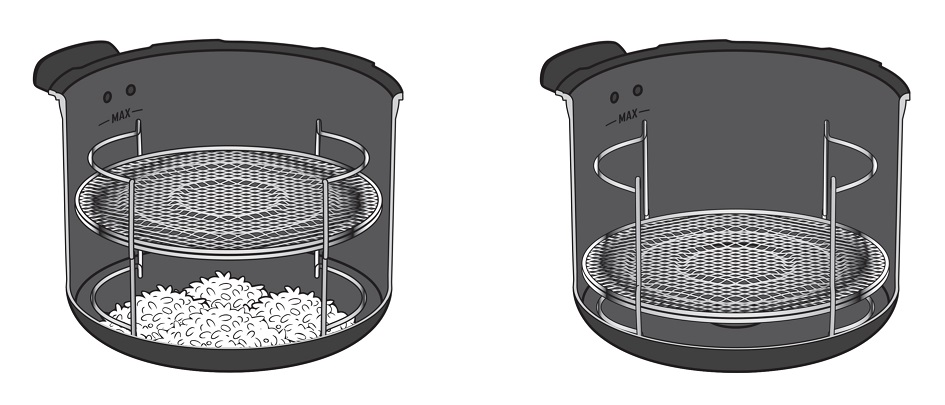
You can also use the grid for manual cooking without any problem.
Food will not be stable on the grid if you use it outside the bowl.
If the grid is still hot, place it on a heat-resistant surface.
You can then take the hot grid from the bowl using potholders.
The grid can only be used in multicookers with a capacity of 5.8L and above.
* 8 jars set (ref. XA6140E0)
You can place 4 jars underneath and 2 jars on top.
Be careful to place the two upper jars towards the front to prevent them from tipping over or hindering the lid from closing.
8 jars set (ref. XA6140E0):
You can place the 8 jars with the 2 supports of 4 jars one on top of the other in the bowl.
If the containers are still hot, place them on a heat-resistant surface.
See the services


